It’s the end of winter and you’re looking at your house, noticing that the render is looking a bit worse for wear. You remember hearing that render needs to be regularly cleaned or it can start to look bad, so you decide to give it a go. But what’s the best way to clean render? In this article, we’ll show you how to clean render using a pressure washer, hose, or brush. We’ll also give you some tips for keeping your render clean in the future.
What is render and why should you clean it
Render is an important part of the exterior of your home, as it provides protection from the weather and helps to keep your home looking its best. But like any other part of your home, it requires regular cleaning to keep it looking its best.
Render is a type of exterior wall finish that is traditionally made from a mixture of cement, sand, water and sometimes lime.
In more recent years modern materials have been used to create renderings such as acrylic, silicone and polymers which provide different benefits, like being more flexible, having a longer lifespan or being more resistant to mould.
Render can also come in a variety of colours which helps it to achieve different looks for your home.
It can be applied in a variety of ways and is often used on homes for its durability and weatherproofing properties.
If you notice any of the following, it’s time to clean your render:
- Algae or moss growth
- Stains from things like rainwater or dirt
- Cracks or flaking
- Rust stains
- Render that is starting to look dull
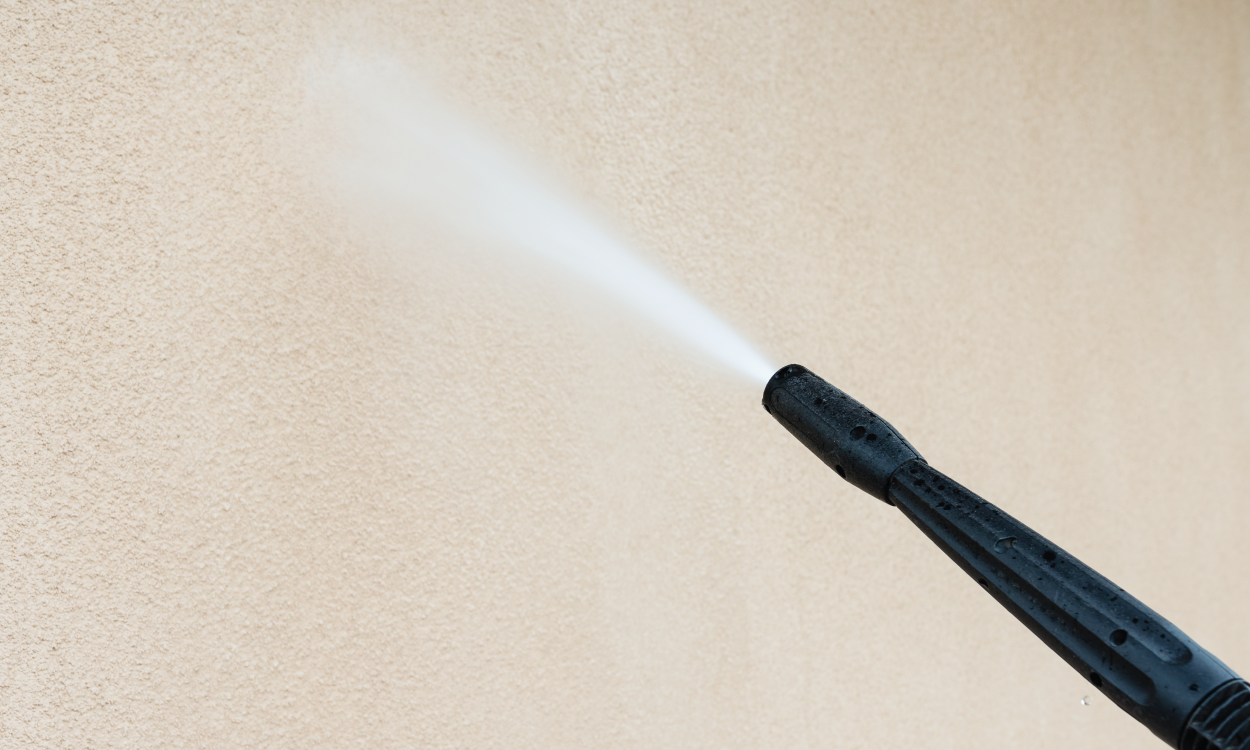
How to clean render using a pressure washer
One of the best ways to clean render is by using a pressure washer. Pressure washers are powerful tools that can quickly and easily remove dirt, grime, and other build-ups from your render.
When using a pressure washer to clean render, you will need to be careful not to damage the surface. Be sure to hold the nozzle at least 12 inches away from the surface and use a low-pressure setting.
You should also use a fan nozzle to avoid too much pressure in one single spot on the render.
Steps to clean render with a pressure washer
- Prepare the area, pressure washing will create spray back, meaning that the dirt and grime on the render will spread whilst it is being removed. If you have doors and windows near the area it’s a good idea to cover them to avoid having to clean those afterwards.
- Wear protective clothing – water spray from the pressure washer is fine but fast! if this hits your bare skin it can be painful, so make sure you cover-up.
- Fill your pressure washer with a suitable detergent, water will be suitable for mild stains but for things like algae you may need a fungicide cleaner. Tip: Make sure you check that any detergent you use is suitable for your machine as the wrong types can cause blockages.
- Using the fan nozzle, use a slow circular motion and hold the nozzle at least 30cm from the render, start at the top of the area and work your way down. Start at one end of the wall and work your way across, overlapping each stroke by a few inches until the whole wall is complete.
If you’re not sure how to use a pressure washer, or if you don’t have one available, you can always hire a professional render cleaning company to do the job for you.
While a pressure washer can be a great way to clean render, it’s not always possible or practical to use one. In those cases, you can use a brush to clean it.
When using a brush to clean render, you will need to be careful not to damage the surface. Be sure to use a soft-bristled brush.
You should also use a circular motion to avoid damaging the render.
Steps to cleaning render with a brush
- Prepare the area, brushing will create debris that will spread whilst it is being removed so cover any areas that could be affected.
- Wet the render down with a hose before you start brushing, this will help to avoid damaging the render.
- Apply a cleaning agent mixed with water, you can use:
- Water – for mild stains
- Mild detergent – such as washing up liquid, for tougher stains
- Bleach – But check a small area first!
- Fungicide cleaner – for algae
- Start at the top of the area and work your way down. Start at one end of the wall and work your way across, overlapping each stroke by a few inches until the whole wall is complete.
- Rinse the area with a hose to remove any cleaning agent and debris.
Now that you have done all of the hard work and have your render looking as good as new, you will want to keep it that way!
Here are some tips to help you:
- Clean any dirt and debris from gutters and downpipes as this can cause staining on the render.
- Trim any trees or plants that are close to the house as they can drop leaves and other debris on the render.
- Inspect the render regularly for any cracks or damage and repair them as soon as possible to avoid further damage.
- If you live in an area that is prone to algae, consider having your render treated with an anti-algae solution.
Q. How often should I clean my render?
A. This will depend on the environment that your house is in and the type of render that you have. If you live in a coastal area or in an area that is prone to pollution, you may need to clean your render more often. We recommend cleaning it at least once a year, but more if necessary.
Q. Can I use a pressure washer to clean my render?
A. Yes, but you will need to be careful not to damage the surface. Be sure to hold the nozzle at least 12 inches away from the surface and use a low-pressure setting. You should also use a fan nozzle to avoid putting too much pressure on one single spot on the wall.
Q. Can I use a brush to clean my render?
A. Yes, but you will need to be careful not to damage the surface. Be sure to use a soft-bristled brush and avoid using too much pressure. You should also use a circular motion as this will help to avoid damaging the render.
Q. What cleaning products can I use on my render?
A. You can use water for mild stains, or a mild detergent such as washing up liquid for tougher stains. If you have algae, you can use a fungicide cleaner. Just be sure to check the label of any cleaning product that you use to make sure it is safe for use on render.
Q. Do I need to rinse the render after cleaning it?
A. Yes, you should always rinse the render after cleaning it to remove any cleaning agent and debris. You can do this with a hose or pressure washer.
Q. Can I paint my render?
A. You can paint your render, but it is not recommended as it can trap moisture which can lead to problems such as dampness and mould. If you do decide to paint your render, be sure to use breathable paint that will allow the render to breathe.
Q. My render is cracked, what can I do?
A. If your render is cracked, you will need to repair it as soon as possible to avoid further damage. You can either fill the cracks with mortar or seal them with a masonry sealer. If the cracks are large, you may need to replace the render.
Q. My render is flaking, what can I do?
A. If your render is flaking, it is likely that it is due to moisture damage. You will need to repair the damage and then waterproof the render to prevent further problems.
Source: www.ukhomeimprovement.co.uk